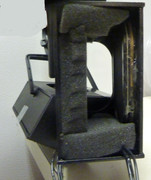
Spare Tire
100+ Head-Fier
- Joined
- May 12, 2006
- Posts
- 234
- Likes
- 12
Anyone done it?
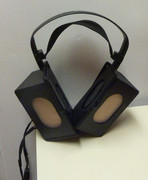
So a couple of years ago, I mean probably a decade ago when I was here, there was someone who posted about sending in their stax sigma to the American distributor to get it upgraded with lambda 404 drivers, cable and headband. I contacted the distributor back then for a quote and it was about 600 USD. Was a broke student back then so didn't go through with it, also didn't want to just toss my sigma drivers seing as they were the only normal bias phones I had and the amp would be quite lonely without it.
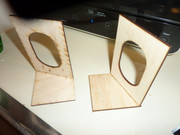
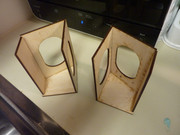
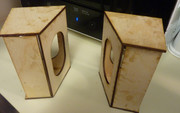
Back then I thought I'd ask for the old cable and drivers and headband back and make a wooden enclosure to mount the old drivers on. Now my woodworking skills are rudimentary to say the least. Fast-forward a decade, 3D printers are a common household item, has anyone gotten around to resurecting the sigma enclosure via 3D printing? And having stax mount a modern lambda driver in it.
So a couple of years ago, I mean probably a decade ago when I was here, there was someone who posted about sending in their stax sigma to the American distributor to get it upgraded with lambda 404 drivers, cable and headband. I contacted the distributor back then for a quote and it was about 600 USD. Was a broke student back then so didn't go through with it, also didn't want to just toss my sigma drivers seing as they were the only normal bias phones I had and the amp would be quite lonely without it.
Back then I thought I'd ask for the old cable and drivers and headband back and make a wooden enclosure to mount the old drivers on. Now my woodworking skills are rudimentary to say the least. Fast-forward a decade, 3D printers are a common household item, has anyone gotten around to resurecting the sigma enclosure via 3D printing? And having stax mount a modern lambda driver in it.